Moist Chocolate Layer Cake From Scratch
Highlighted under: Pastry & Sweets
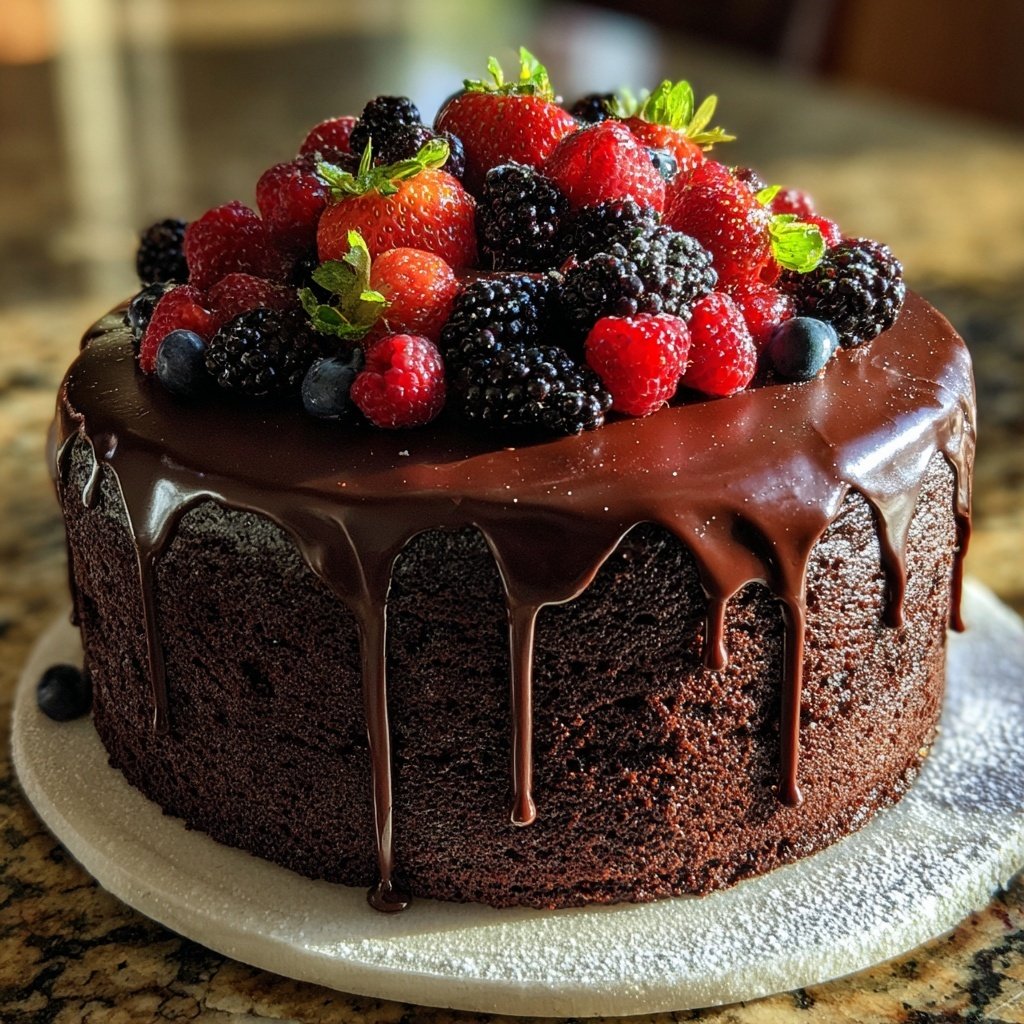
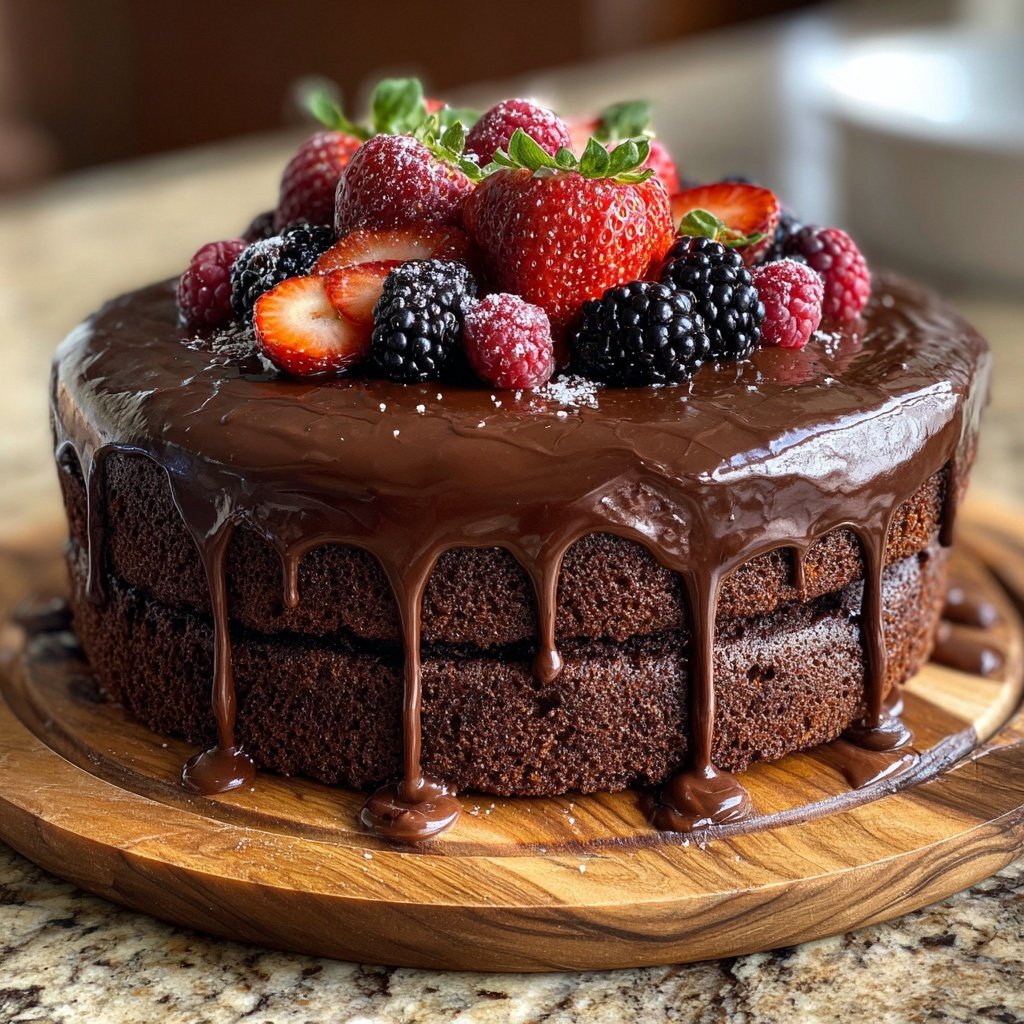
I absolutely love baking this Moist Chocolate Layer Cake from scratch! There's something incredibly satisfying about creating a rich, decadent dessert entirely on my own. Each layer is impossibly moist and filled with a velvety chocolate flavor that has everyone asking for seconds. The process is straightforward, and using high-quality cocoa powder enhances the cake's deep flavor. Whether it’s a birthday celebration or a simple dessert to share with friends, this cake always brings joy to the table.
When I first decided to make a chocolate layer cake from scratch, I was unsure if I could achieve the same moistness I loved in bakery cakes. After testing various recipes, I landed on a combination of techniques—using boiling water in the batter to create steam during baking, which ensures moisture throughout. Every time I cut a slice, the rich chocolate aroma fills the kitchen, making it impossible not to be excited.
While experimenting with frostings, I discovered that a simple vanilla buttercream complements the deep chocolate flavor perfectly. I recommend allowing the cakes to cool completely before frosting; this prevents the icing from melting and maintains that gorgeous look when serving. It’s truly a crowd-pleaser!
Why You Will Love This Recipe
- Rich chocolate flavor paired with fresh orange zest
- Creamy texture that melts in your mouth
- Perfect for celebrations or as a sweet indulgence
Creating the Perfect Cake Batter
Achieving the right consistency in your cake batter is crucial for a moist and fluffy chocolate layer cake. When mixing the dry ingredients, make sure to sift the cocoa powder thoroughly to eliminate any lumps, which can affect the texture. Incorporating boiling water into the batter is a unique step that helps activate the cocoa and results in a rich, velvety cake. Don't worry about the thin consistency; this hydration contributes to the moistness of the final product.
When adding the wet ingredients, I recommend using room temperature eggs and milk, as this helps to emulsify the batter more effectively. Mixing the batter for a full two minutes at medium speed allows for better aeration, resulting in a lighter cake. If you notice any lumps in the batter after mixing, gently fold it with a spatula to combine without overmixing, which can lead to a dense cake.
Frosting Tips for a Flawless Finish
When making the frosting, it's essential to ensure that your butter is softened but not melted. It should be creamy and easily spreadable, which will create a smooth frosting without any graininess. Start by beating the butter until it's pale and fluffy, then slowly incorporate the powdered sugar to avoid a messy cloud of sugar dust. If your frosting seems too thick, add a teaspoon of heavy cream at a time until it reaches your desired consistency.
As you frost the cake, a bench scrapper can be a helpful tool for achieving a clean finish on the sides. I like to apply a crumb coat first, which is a thin layer of frosting that traps any loose crumbs. Chill the frosted cake in the refrigerator for about 30 minutes before applying the final layer of frosting. This helps set the crumbs and ensures a smooth, polished look.
Ingredients
Gather all your ingredients before you begin to ensure a smooth baking process.
For the Cake
- 1 3/4 cups all-purpose flour
- 3/4 cup unsweetened cocoa powder
- 2 cups granulated sugar
- 1 1/2 teaspoons baking powder
- 1 1/2 teaspoons baking soda
- 1 teaspoon salt
- 2 large eggs
- 1 cup whole milk
- 1/2 cup vegetable oil
- 2 teaspoons vanilla extract
- 1 cup boiling water
For the Frosting
- 1 cup unsalted butter, softened
- 3 1/2 cups powdered sugar
- 1/4 cup heavy cream
- 1 teaspoon vanilla extract
- Pinch of salt
Make sure to measure each ingredient accurately for the best results!
Instructions
Before starting, preheat your oven to 350°F (175°C) and prepare your cake pans.
Prepare the Cake Pans
Grease and flour two 9-inch round cake pans or line them with parchment paper.
Mix Dry Ingredients
In a large bowl, sift together flour, cocoa powder, sugar, baking powder, baking soda, and salt until well combined.
Add Wet Ingredients
Stir in eggs, milk, oil, and vanilla extract. Beat on medium speed for 2 minutes until smooth.
Incorporate Boiling Water
Carefully stir in the boiling water. The batter will be thin, but this is normal.
Bake the Cakes
Pour the batter evenly into the prepared pans and bake for 30 minutes or until a toothpick inserted comes out clean.
Cool the Cakes
Remove from the oven and let the cakes cool in the pans for 10 minutes. Then turn them out onto a wire rack to cool completely.
Prepare the Frosting
In a medium bowl, beat together the softened butter, powdered sugar, cream, vanilla, and salt until the mixture is fluffy.
Frost the Cake
Once the cakes are completely cool, place one layer on a serving plate, spread frosting on top, then add the second layer and frost the top and sides.
Serve and Enjoy
Slice the cake and serve it to your delighted friends and family!
Make sure to clean your kitchen as you go to keep the space tidy!
Pro Tips
- To elevate the cake even further, try adding a layer of raspberry jam between the cake layers for a fruity contrast!
Storage and Make-Ahead Tips
This chocolate layer cake can be made ahead of time, making it perfect for busy occasions. You can bake the cake layers a day in advance and store them wrapped tightly in plastic wrap at room temperature. Just remember to let them cool completely before wrapping to keep them moist. Frosting can also be prepared a day early; simply store it in an airtight container in the refrigerator. Before using, let it come back to room temperature and re-whip it for a fluffy texture.
If you have leftover cake, it can be stored in an airtight container for up to 3 days at room temperature or the refrigerator. For longer storage, consider freezing individual slices. Wrap each slice tightly in plastic wrap and then in aluminum foil to prevent freezer burn. The cake can last in the freezer for up to three months. When you're ready to enjoy it, let it thaw in the refrigerator overnight and bring it to room temperature before serving.
Variations and Serving Suggestions
Feel free to get creative with this recipe! You can add a layer of fresh raspberries or strawberries between the cake layers for a fruity twist. Another option is to infuse the frosting with flavorings such as orange or almond extract to complement the rich chocolate flavor. For an adult version, consider adding a splash of coffee or espresso powder to the batter to intensify the chocolate flavor further.
As for serving, this cake pairs wonderfully with a scoop of vanilla ice cream or a dollop of whipped cream. You can also drizzle some chocolate ganache over each slice for a decadent touch. When serving it at parties, I often decorate the top with chocolate shavings or edible flowers for an elegant presentation that elevates your dessert to a crowd-pleaser.
Questions About Recipes
→ Can I use a different type of flour?
Yes, you can substitute cake flour for all-purpose flour for a lighter texture.
→ How can I store the cake?
Store the cake in an airtight container at room temperature for up to 3 days or refrigerate it for up to a week.
→ Can I freeze the cake?
Absolutely! Wrap the cooled cake layers tightly in plastic wrap and freeze for up to 3 months.
→ What can I use instead of eggs?
You can replace eggs with flaxseed meal or applesauce. Use 1/4 cup of unsweetened applesauce per egg.
Moist Chocolate Layer Cake From Scratch
Created by: Maya Richardson
Recipe Type: Pastry & Sweets
Skill Level: Intermediate
Final Quantity: 8 servings
What You'll Need
For the Cake
- 1 3/4 cups all-purpose flour
- 3/4 cup unsweetened cocoa powder
- 2 cups granulated sugar
- 1 1/2 teaspoons baking powder
- 1 1/2 teaspoons baking soda
- 1 teaspoon salt
- 2 large eggs
- 1 cup whole milk
- 1/2 cup vegetable oil
- 2 teaspoons vanilla extract
- 1 cup boiling water
For the Frosting
- 1 cup unsalted butter, softened
- 3 1/2 cups powdered sugar
- 1/4 cup heavy cream
- 1 teaspoon vanilla extract
- Pinch of salt
How-To Steps
Grease and flour two 9-inch round cake pans or line them with parchment paper.
In a large bowl, sift together flour, cocoa powder, sugar, baking powder, baking soda, and salt until well combined.
Stir in eggs, milk, oil, and vanilla extract. Beat on medium speed for 2 minutes until smooth.
Carefully stir in the boiling water. The batter will be thin, but this is normal.
Pour the batter evenly into the prepared pans and bake for 30 minutes or until a toothpick inserted comes out clean.
Remove from the oven and let the cakes cool in the pans for 10 minutes. Then turn them out onto a wire rack to cool completely.
In a medium bowl, beat together the softened butter, powdered sugar, cream, vanilla, and salt until the mixture is fluffy.
Once the cakes are completely cool, place one layer on a serving plate, spread frosting on top, then add the second layer and frost the top and sides.
Slice the cake and serve it to your delighted friends and family!
Extra Tips
- To elevate the cake even further, try adding a layer of raspberry jam between the cake layers for a fruity contrast!
Nutritional Breakdown (Per Serving)
- Calories: 380 kcal
- Total Fat: 26g
- Saturated Fat: 15g
- Cholesterol: 195mg
- Sodium: 85mg
- Total Carbohydrates: 32g
- Dietary Fiber: 3g
- Sugars: 24g
- Protein: 6g