Halloween Mummy Cookies
Highlighted under: Pastry & Sweets
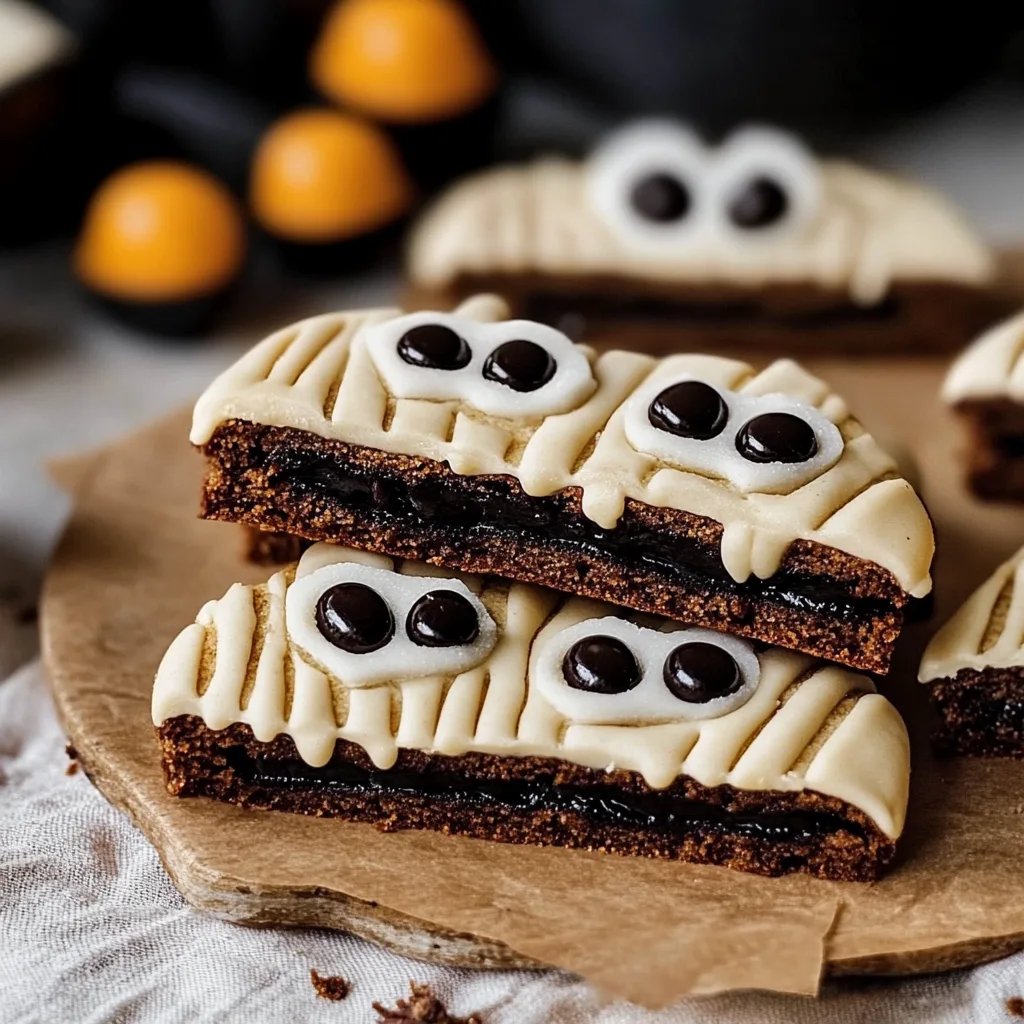
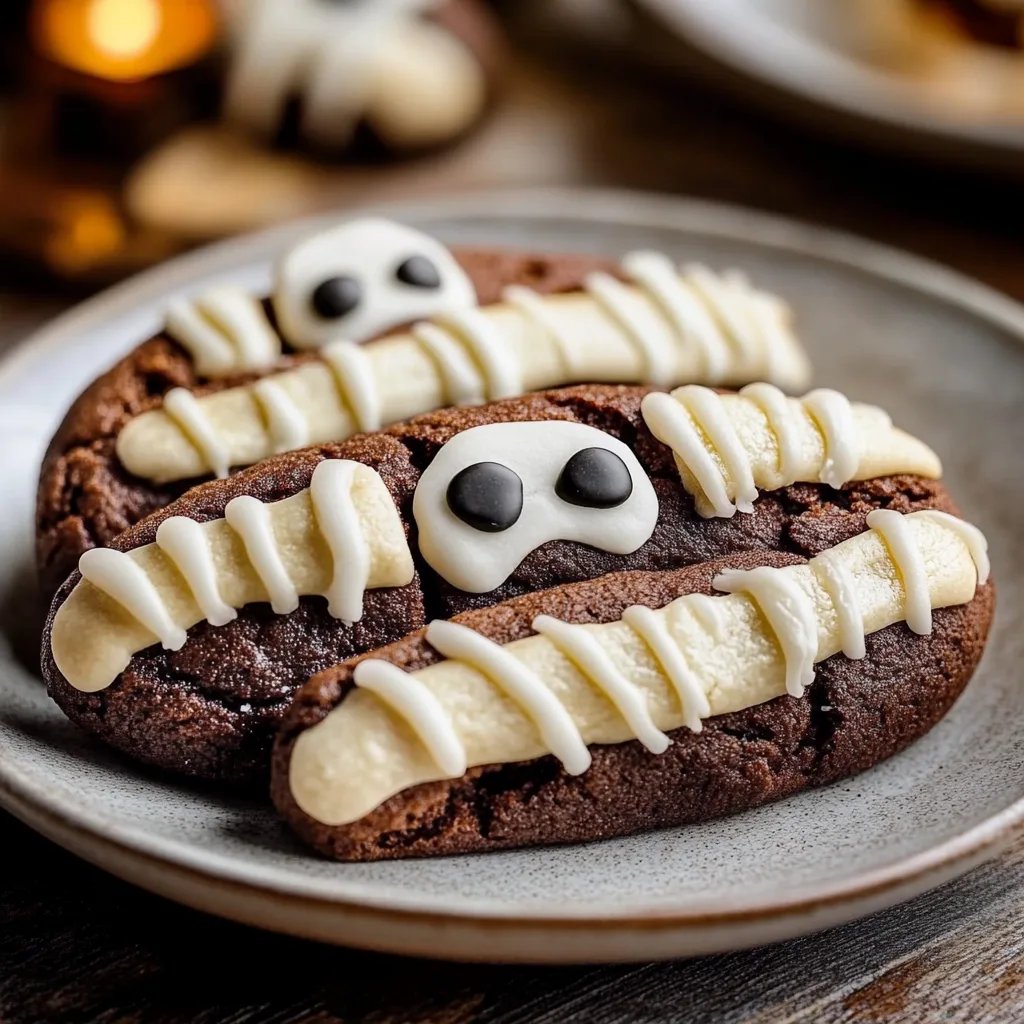
Create a fun and festive treat with these adorable Halloween Mummy Cookies! Soft and chewy cookies are covered in white chocolate and decorated to resemble mummies, making them perfect for Halloween parties or family gatherings. These delicious cookies are not only a delightful addition to your holiday table but also a hit with kids and adults alike. Get ready to wow your guests with these charming and spooky snacks!
Halloween Mummy Cookies are the perfect treats to bring festive joy to your gatherings. These cookies blend humor and creativity, making them a favorite among all ages. Watch as kids giggle and adults smile at these whimsical, sweet creations!
A Spooky Treat for Everyone
Halloween is the perfect time to indulge in creative and spooky treats that bring joy to both kids and adults. These Halloween Mummy Cookies not only look fantastic but taste incredible too! The combination of soft, chewy cookies and rich white chocolate creates a delightful experience in every bite. Imagine the smiles on your guests' faces as they sink their teeth into these whimsical cookies at your Halloween party or family gathering.
These mummy cookies are incredibly versatile, allowing you to customize them with your favorite toppings and decorations. Feel free to get inventive – you can add colored sprinkles, edible glitter, or even different chocolate shapes to create unique mummy designs. The only limit is your imagination! These cookies also make fantastic gifts for friends, family, or classroom treats for your kids to share with their classmates.
Easy to Make and Fun to Decorate
One of the best parts about making Halloween Mummy Cookies is how easy they are to prepare. With straightforward ingredients and simple steps, even novice bakers can craft these delightful treats with confidence. The cookie dough comes together quickly, and the baking process is relatively short, meaning you can whip up a batch in no time! This makes them perfect for last-minute Halloween celebrations or even just a cozy night in with the family.
Decorating the cookies is where the real fun begins! Whether you choose to pipe the melted white chocolate or use a fork for more creativity, the decorating process can become a fun family activity. Get the kids involved in designing the mummies, allowing them to express their creativity while bonding over a delicious project. It's an excellent way to make memories while preparing for the Halloween festivities!
Storing and Serving Suggestions
Once your Halloween Mummy Cookies are fully decorated, you'll want to find the best way to store them to maintain their freshness. To keep the cookies soft and chewy, store them in an airtight container at room temperature. They can last up to a week, but we highly doubt they'll last that long amidst all the Halloween fun! You can also freeze the undecorated cookies for up to three months. Just be sure to thaw them before decorating when you're ready to enjoy them again.
For a more festive presentation, consider serving these cookies on Halloween-themed platters or trays. You can also pair them with other spooky snacks like pumpkin cupcakes or ghost-shaped marshmallows for an impressive spread. No matter how you choose to serve them, these mummy cookies are sure to be the star of the show and will create lasting memories for everyone who enjoys them!
Ingredients
For the Cookies
- 2 1/2 cups all-purpose flour
- 1 teaspoon baking soda
- 1/2 teaspoon salt
- 1 cup unsalted butter, softened
- 1 1/2 cups brown sugar
- 1/2 cup granulated sugar
- 2 large eggs
- 2 teaspoons vanilla extract
For Topping
- 1 cup white chocolate chips
- 1/2 cup chocolate chips for eyes
Make sure to have all ingredients ready before you begin!
Instructions
Prepare the Dough
In a large mixing bowl, cream together the butter, brown sugar, and granulated sugar until light and fluffy. Add in the eggs and vanilla extract, mix well.
Combine Dry Ingredients
In another bowl, whisk together the flour, baking soda, and salt. Gradually mix the dry ingredients into the wet mixture until combined.
Bake the Cookies
Preheat the oven to 350°F (175°C). Drop tablespoon-sized dough balls onto a baking sheet lined with parchment paper. Bake for about 10 minutes or until golden.
Decorate the Cookies
Melt the white chocolate chips in a microwave, stirring until smooth. Dip the tops of the cooled cookies in the chocolate and create mummy designs using a fork or piping bag with extra melted chocolate.
Add Eyes
Place two chocolate chips on each cookie to resemble eyes once the white chocolate has set.
Let the cookies cool completely before serving.
Pro Tips
- For a fun twist, use colored chocolate melts for different mummy designs!
Baking Tips and Tricks
When baking cookies, precision is crucial for achieving the perfect texture. Be sure to measure your ingredients accurately, as even slight variations can affect the outcome. For the best results, use room temperature butter; this helps create a creamy mixture that captures air, leading to a light and fluffy cookie. Additionally, avoid overmixing your dough once the dry ingredients are combined to ensure your cookies remain soft.
Another quick tip is to use a cookie scoop for uniformity in size. This will ensure even baking time and help each cookie look perfect. Adding a pinch of cinnamon or nutmeg to the dough can give your cookies a delightful hint of warmth that complements the brown sugar beautifully.
Adapting for Dietary Restrictions
If you're looking to adapt this recipe for dietary restrictions, there are several easy swaps you can make without sacrificing flavor. For a gluten-free version, substitute all-purpose flour with a gluten-free flour blend and ensure that other ingredients, like baking soda and chocolate chips, are gluten-free certified. This allows everyone to enjoy their mummy cookies without worrying about gluten sensitivities.
To make these cookies dairy-free, use vegan butter or coconut oil instead of regular butter, and opt for dairy-free chocolate chips. Not only will they still look adorable, but they’ll also remain tasty for those who need to avoid dairy. Remember, Halloween treats should be for everyone to enjoy!
Questions About Recipes
→ Can I make the dough ahead of time?
Yes, you can refrigerate the dough for up to 2 days before baking.
→ How should I store the cookies?
Store in an airtight container at room temperature for up to one week.
Halloween Mummy Cookies
Created by: Maya Richardson
Recipe Type: Pastry & Sweets
Skill Level: Easy
Final Quantity: 24 cookies
What You'll Need
For the Cookies
- 2 1/2 cups all-purpose flour
- 1 teaspoon baking soda
- 1/2 teaspoon salt
- 1 cup unsalted butter, softened
- 1 1/2 cups brown sugar
- 1/2 cup granulated sugar
- 2 large eggs
- 2 teaspoons vanilla extract
For Topping
- 1 cup white chocolate chips
- 1/2 cup chocolate chips for eyes
How-To Steps
In a large mixing bowl, cream together the butter, brown sugar, and granulated sugar until light and fluffy. Add in the eggs and vanilla extract, mix well.
In another bowl, whisk together the flour, baking soda, and salt. Gradually mix the dry ingredients into the wet mixture until combined.
Preheat the oven to 350°F (175°C). Drop tablespoon-sized dough balls onto a baking sheet lined with parchment paper. Bake for about 10 minutes or until golden.
Melt the white chocolate chips in a microwave, stirring until smooth. Dip the tops of the cooled cookies in the chocolate and create mummy designs using a fork or piping bag with extra melted chocolate.
Place two chocolate chips on each cookie to resemble eyes once the white chocolate has set.
Extra Tips
- For a fun twist, use colored chocolate melts for different mummy designs!
Nutritional Breakdown (Per Serving)
- Total Fat: 6g
- Saturated Fat: 3g
- Carbohydrates: 18g
- Protein: 1g