Compact Urban Chicken Run Build
Highlighted under: Effortless Weeknight Cooking
I love creating spaces that allow my chickens to thrive, even in a small urban setting. Our Compact Urban Chicken Run Build was born from a need for a practical yet stylish solution to keep my girls safe and happy. Over the years, I've refined the design to ensure it meets both the aesthetics of my garden and the needs of the chickens. With just a few hours of work, I can transform a small area into a productive haven for my feathered friends, all while being mindful of my limited space.
Building a chicken run has been one of the most rewarding projects for my urban garden. I initially struggled with space constraints, but after a bit of planning, I settled on a compact design that works beautifully. I learned that using reclaimed materials not only saves money but also adds character to the run. Each time I watch my chickens exploring their new territory, I feel a sense of pride.
What really stands out in this build is the versatility of the design. It can be adjusted based on the size of the yard, and the addition of plants around the run provides both shade and a habitat for beneficial insects. By including a simple roof, I ensured that my chickens can enjoy their space rain or shine!
Why You'll Love This Build
- Efficient use of limited space in urban settings
- Stylish design that complements your garden
- Provides a safe, stimulating environment for chickens
Choosing the Right Materials
When selecting materials for your urban chicken run, focus on durability and safety. Wooden planks should be treated or naturally resistant to rot, ensuring longevity. Pine or cedar is a great choice due to its natural insect-repelling properties. The wire mesh needs to be sturdy enough to withstand potential predator attacks. Aim for a gauge thickness of at least 14; this is strong enough to fend off raccoons and other common urban predators.
In addition to strength, consider weather resistance for your plywood roof. Opt for exterior-grade plywood, as it has a higher resistance to moisture, preventing warping over time. Outdoor paint or sealant not only adds aesthetic appeal but also provides an extra layer of protection against the elements, keeping your chickens both dry and secure.
Building Techniques for Stability
A common mistake when building a frame is neglecting proper measurements and securing joints adequately. Ensure that your rectangular base is level before securing it with screws; this prevents future instability. Use corner braces for additional support, especially if your run is larger than typical sizes. This will enhance its resilience against everyday wear and wind stress.
Furthermore, while attaching the wire mesh, pull it taut to minimize sagging. Use staples for a strong grip, ensuring there are no gaps large enough for chicken escape or predator entry. You can also double up on mesh layers in high-risk areas to create added security against burrowing animals.
Ingredients
Gather the following materials before starting your build:
Materials
- Wooden planks (for framing)
- Wire mesh (for safety)
- Plywood (for the roof)
- Screws and nails
- Hinges (for the door)
- Outdoor paint or sealant
- Tools (saw, drill, hammer, measuring tape)
Make sure to measure twice and cut once!
Instructions
Follow these steps to create your compact chicken run:
Constructing the Frame
Using the wooden planks, create a rectangular frame that will serve as the base of your run. Secure the joints with screws to ensure stability.
Adding the Walls
Attach the wire mesh around the frame to keep your chickens safe from predators while allowing them fresh air and sunlight.
Building the Roof
Cut the plywood to fit the dimensions of your run and attach it to the top. This will protect your chickens from rain and ensure they have a cozy space.
Creating the Door
Cut a section in one of the walls to create a door. Attach it with hinges so you can easily access your chickens.
Finishing Touches
Paint or seal the exterior to protect it from the elements. Optionally, add some plants around the run for aesthetics and shade.
Enjoy your new urban chicken run and watch your chickens thrive!

Pro Tips
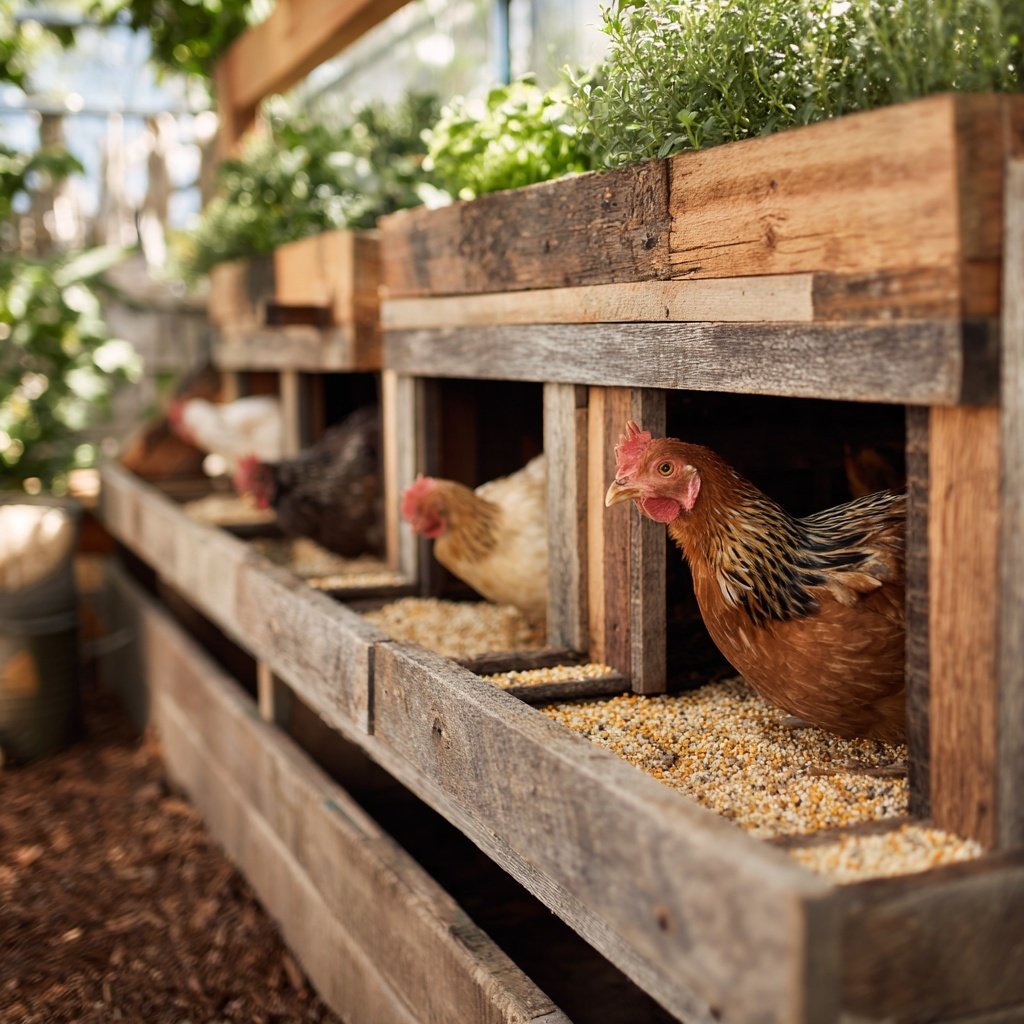
- Consider adding nesting boxes inside the run for your hens to lay eggs comfortably. Regularly check the integrity of the wire mesh to ensure safety.
Maintenance and Care
Regular maintenance is crucial to keep your chicken run safe and functional. At least once a week, inspect the integrity of the wire mesh and wood for signs of wear or damage. Look out for any areas where predators could potentially enter, and patch up any holes immediately to prevent escapes or attacks.
Cleaning the run regularly is also key for your chickens' health. Remove waste and old bedding to prevent the build-up of harmful bacteria. A simple solution of water and vinegar can be used for a safe, non-toxic clean, helping to keep the environment fresh.
Enhancing Your Chicken's Environment
To further enrich your hens' lives, consider adding perches or nesting boxes made from scrap wood. This not only maximizes your space but also provides them with additional comfort and fun. Hens naturally enjoy climbing and exploring, so incorporating these elements will make their environment more stimulating.
You can also introduce natural plants around the run's perimeter for shade and aesthetics. Herbs like rosemary or mint can be beneficial, as their scents may deter some pests while being safe for chickens. Just be sure to avoid any plants toxic to chickens.
Questions About Recipes
→ How much space do chickens need?
Generally, provide at least 4 square feet per chicken inside the run.
→ Can I build this run in a small garden?
Absolutely! This design is specifically made for compact urban spaces.
→ What materials do I need if I want to make it more substantial?
You can use thicker wood and stronger wire mesh for added durability.
→ How can I keep my chickens entertained?
Incorporate climbing structures and foraging toys to keep them engaged.
Compact Urban Chicken Run Build
Created by: Maya Richardson
Recipe Type: Effortless Weeknight Cooking
Skill Level: Intermediate
Final Quantity: 1
What You'll Need
Materials
- Wooden planks (for framing)
- Wire mesh (for safety)
- Plywood (for the roof)
- Screws and nails
- Hinges (for the door)
- Outdoor paint or sealant
- Tools (saw, drill, hammer, measuring tape)
How-To Steps
Using the wooden planks, create a rectangular frame that will serve as the base of your run. Secure the joints with screws to ensure stability.
Attach the wire mesh around the frame to keep your chickens safe from predators while allowing them fresh air and sunlight.
Cut the plywood to fit the dimensions of your run and attach it to the top. This will protect your chickens from rain and ensure they have a cozy space.
Cut a section in one of the walls to create a door. Attach it with hinges so you can easily access your chickens.
Paint or seal the exterior to protect it from the elements. Optionally, add some plants around the run for aesthetics and shade.
Extra Tips
- Consider adding nesting boxes inside the run for your hens to lay eggs comfortably. Regularly check the integrity of the wire mesh to ensure safety.